
Hostinger is one of the most popular web hosting providers, known for affordability and ease of use. This tutorial covers everything from account creation to making your website live.
Step 1: Choose Your Hosting Plan Visit hostinger.com and select a plan:
Shared Hosting ($2.99/month): Best for beginners, small websites, and blogs. Includes 100GB SSD, free SSL, and email accounts.
Cloud Hosting ($9.99/month): For growing sites needing more resources. Includes dedicated IP and daily backups.
VPS Hosting ($5.99/month): For developers needing root access and custom configurations.
For your first website, Shared Hosting Premium is ideal. It includes a free domain for the first year.
Step 2: Register Your Domain During checkout, choose your domain name:
-
Keep it short and memorable
-
Use .com for credibility, or country-specific TLDs for local businesses
-
Avoid hyphens and numbers when possible
-
Check trademark databases to avoid legal issues
If you already own a domain, select "Use Existing Domain" and update nameservers later.
Step 3: Complete Purchase Create your Hostinger account. Choose billing period (longer terms offer better discounts). Complete payment via credit card, PayPal, or cryptocurrency.
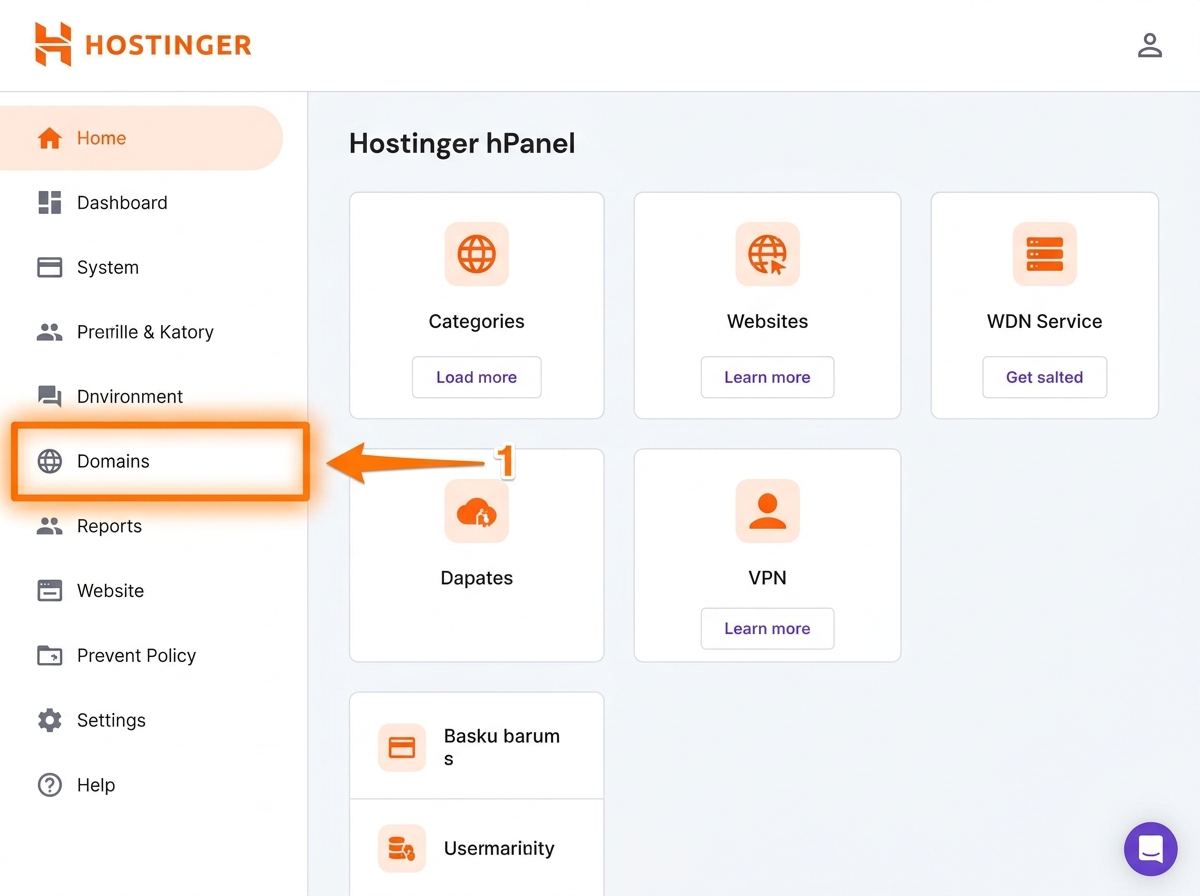
Step 4: Access hPanel After purchase, log into hPanel (Hostinger's custom control panel). It's more user-friendly than traditional cPanel.
Step 5: Set Up Your Website
Option A: Using Hostinger Website Builder
-
In hPanel, click "Website" → "Auto Installer"
-
Select "Hostinger Builder"
-
Choose a template matching your industry
-
Customize colors, fonts, and content
-
Publish when ready
Option B: Installing WordPress
-
Go to "Website" → "Auto Installer"
-
Select WordPress
-
Choose your domain
-
Set admin username and password (use strong credentials)
-
Select a theme (you can change later)
-
Click Install
WordPress installs in under 2 minutes. Access your site at
yourdomain.com/wp-admin.Option C: Uploading Custom Files For HTML/CSS/JavaScript websites:
-
In hPanel, go to "Files" → "File Manager"
-
Navigate to
public_htmlfolder -
Delete default
index.html -
Upload your files (drag and drop or use Upload button)
-
Ensure your homepage is named
index.html
For larger projects, use FTP:
-
Download FileZilla (free FTP client)
-
In hPanel, find FTP Accounts under Files
-
Create FTP credentials
-
Connect using: Host (your domain), Username, Password, Port 21
-
Upload files to
public_html
Step 6: Configure SSL Certificate SSL encrypts data between visitors and your server. Hostinger provides free SSL via Let's Encrypt.
-
In hPanel, go to "Advanced" → "SSL"
-
Select your domain
-
Click "Install" for Let's Encrypt SSL
-
Wait 5-10 minutes for activation
-
Your site will be accessible via HTTPS
Step 7: Create Professional Email
-
In hPanel, go to "Emails" → "Email Accounts"
-
Click "Create New Email Account"
-
Enter desired address (e.g., info@yourdomain.com)
-
Set password
-
Access email via Hostinger webmail or configure in Gmail/Outlook
Step 8: Set Up Backups
-
Go to "Files" → "Backups"
-
Enable automatic daily backups
-
Perform manual backup before major changes
-
Download backups locally for extra security
Step 9: Optimize Performance
Enable Caching:
-
In hPanel, find "Performance" → "Caching"
-
Enable server-level caching
-
For WordPress, install LiteSpeed Cache plugin
Enable CDN:
-
Go to "Performance" → "CDN"
-
Activate Cloudflare integration
-
Choose appropriate security level
-
CDN distributes your content globally, improving load times
Image Optimization:
-
Use WebP format
-
Compress images before uploading
-
Implement lazy loading
Step 10: Connect Google Services
Google Analytics:
-
Create Google Analytics account
-
Get tracking ID (G-XXXXXXXXXX)
-
Add to your website header or via plugin
Google Search Console:
-
Verify domain ownership
-
Submit sitemap.xml
-
Monitor indexing status and search performance
Step 11: Test Everything Before announcing your site:
-
Test on mobile devices
-
Check all links work
-
Verify forms submit correctly
-
Test contact page functionality
-
Check page load speed (aim for under 3 seconds)
-
Validate SSL is working (padlock icon in browser)
Step 12: Go Live Update your nameservers if using Hostinger's DNS:
-
In hPanel, find nameservers (usually ns1.dns-parking.com, ns2.dns-parking.com)
-
Update at your domain registrar if purchased elsewhere
-
DNS propagation takes 24-48 hours
Troubleshooting Common Issues
Site Not Loading:
-
Check nameservers are correct
-
Clear browser cache
-
Verify files are in
public_html
SSL Not Working:
-
Ensure domain points to Hostinger
-
Wait for DNS propagation
-
Check SSL is installed for correct domain
Slow Loading:
-
Enable caching
-
Optimize images
-
Check plugin conflicts (WordPress)
-
Consider upgrading plan
Conclusion
Hostinger makes website deployment accessible to everyone. Whether using their builder, WordPress, or custom code, you can be live within an hour. Focus on content and marketing—Hostinger handles the technical infrastructure.
Tags:
Hostinger
web hosting
deployment
tutorial
beginner guide